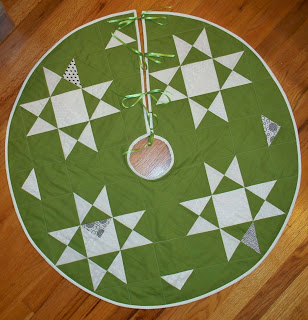
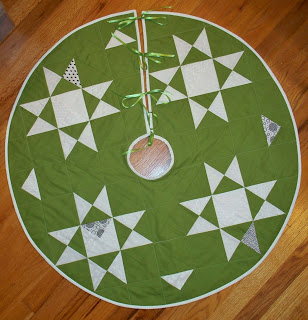
23 Oct North Pole Tree Skirt
Welcome to Tree Skirt Week of the Holiday Craft Bash! Don’t forget to check out the tree skirts by Jessica (yesterday), Meredith (Wednesday) and Jacey (Thursday) and add your project to the Flickr group to be entered to win prizes each week and a grand prize at the end. Meredith will post some sneak peeks of next week’s pillows on Friday.
I can’t seem to think of holiday decorating without using stars. Bright stars in a cold winter night sky is a classic image for holiday time. This time, I set my stars in a pretty green (Kona Peridot to be exact) and used white scraps for the stars. The four half square triangles that I added remind me of four compass points so I’m calling my tree skirt the North Pole Tree Skirt.
Here’s what to do to make one of your own:
You’ll need:
8″ squares or 26 4″ squares
yards 1/4″ ribbon
45″
24″ ribbon or string
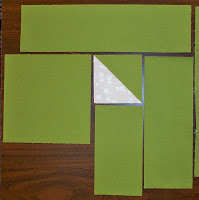
line. I chain stitch about ten squares
at a time sewing one side first. Then I flip
the whole chain around and sew the other side.
line. (I use scissors since an exact
¼” seam allowance is not important at this point).
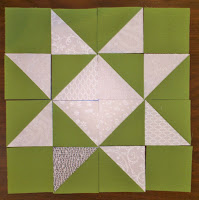
Block layout:
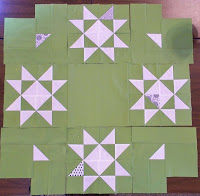
Lay your blocks out as follows:
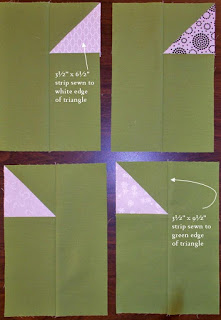
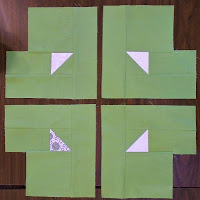
Compass Point block, Star block, Compass Point block;
Star block, 12½” square of green, Star block;
Compass Point block, star block, Compass Point block.
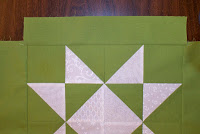
Sew these blocks together into rows. Now, before you sew your rows together, add the 2½” x 12½” strips to the outer edges of the stars. (I added mine after I sewed the rows together when it became obvious that I needed more background there).
Sew the three rows together.
Your top is done! Before we make the sandwich and quilt, we need to mark the final cutting lines for the tree skirt. As with most quilt marking, it is easier to do this before you have the bulk of the batting and backing added. So, press your top and spread it out on a hard surface.
Measure 6″ from the top and left sides of the center 12″ block and mark this point (the center of the block).
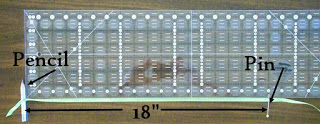
Tie some ribbon or string (not the three yards) around a marking pencil. Measure 18″ from the pencil and place a pin in the ribbon/string at this point.
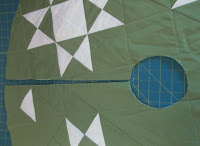
Place the pin at the center point you marked earlier and, keeping the ribbon/string tight, draw an 18″ diameter circle to mark the outer edge of the tree skirt. Do your best to keep the pin and pencil in the same position while you are drawing. Repeat this process with the pin 2½” from the pencil to mark the inner circle. Next, line up your ruler with one end at the center mark and the long edge running between a star block and a compass point and draw a line. This will be where you cut to fit your skirt around the tree. See the finished picture above if this is confusing. I tried to take pictures of these marks but they would not show up at all.
Don’t cut on these lines yet!! Sandwich your backing, batting and top and quilt the tree skirt. I quilted mine along the diagonal lines made by the triangles in the star blocks and compass points. When you are finished quilting, cut along the outer circle, along the inner circle and the line connecting them.
Ties:
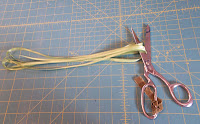
Fold the 3 yards of ribbon in half 4 times and cut at the loops to make 8 roughly equal pieces of ribbon.
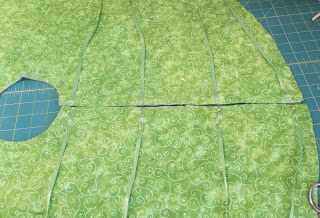
On the back of the tree skirt, place a piece of ribbon 1″ from the inner and outer edges of the skirt on each side of the opening. Place the other four pieces about 5″ apart. Baste in place.
Binding:
We definitely need bias binding here with all these curves! Cut 7 2½” wide bias binding strips from your binding fabric. Join them together and apply them to your skirt as you would to any quilt.
All these steps make this look kind of hard, but it really isn’t. Basically you make a strangely shaped quilt top, quilt it, cut openings and bind it. You can do that! Don’t forget to add your projects to the Flickr group to win prizes! Come back next week for pillows 🙂

Kristin A Jacobson
Posted at 20:11h, 02 Novemberwhen set up to print, the image at the top of page 5 covers the written instructions. Could you fix that so I can make this fabulous tree skirt?? Thank you so much. Kristin J.
SHARON MARPLE
Posted at 19:33h, 25 NovemberI have just made this with a “Harry Potter” wizard print for the background and dark blue stars—-lovely! Thanks for the pattern. I will make more variations, for sure.
Anita
Posted at 03:03h, 24 OctoberGreat tree skirt! Thanks for the tutorial 🙂
Jessica
Posted at 02:10h, 24 OctoberWow Debbie, your tree skirt is so serene and gorgeous. It makes me happy and all ready for Christmas. It's really so beautiful!
Marg
Posted at 21:50h, 23 OctoberIt looks great, I love that you have used black and white instead for some of the white pieces.
Jacey
Posted at 21:31h, 23 OctoberIt's lovely! Peridot is one of my favorite Kona shades. I love your take on the skirt!
Nat at Made in Home
Posted at 13:11h, 23 OctoberThanks for the tutorial! Need one of those this year..