14 Jan Recycling
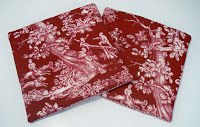
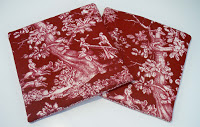
I made these new potholders this morning. I recycled a small bag I made several years ago when I was thinking about doing craft shows. I have always loved the fabric and needed to replace our Christmas potholders. My pattern calls for the “front” of the potholder to be a small quilt so this was perfect as the bag was already quilted and it saved me a step.
This pattern is really amazing in that you don’t need to stitch around the potholder and leave an opening for turning and then try to turn all those bulky layers through the opening before you stitch it closed. The turning area is built into the pockets so once all the pieces are layered, you just sew all the way around the edges.
At some point, I’d like to put a link to a PDF download in the sidebar, but it is not working for me today. I think I used up all my computer related brain power today working on the blog layout and new header 🙂 So for now, I’ll just include the instructions here. (The instructions include a hanging loop which I left off mine).
Easy Turn Potholders
Fabric Requirements:
three 8 ½” squares of fabric.
Fabric A will be the side of the potholder used to touch the pot.
Fabric B will be the outside/pocket on the other side.
Fabric C will be the lining of the pocket – only a small amount will show.
one 1 3/4” x 5” piece of fabric for hanging loop
one 8 ½” square of lining fabric (won’t show)
two 8 ½” squares of regular batting
one 8 ½” square of InsulBright
1. Layer Fabric A, one square of regular batting and one square of lining fabric together and quilt with diagonal lines or as desired.
2. Press hanging loop in half along long edges, wrong sides together.
3. Fold each raw edge, wrong sides together, toward pressed line. Press.
4. Fold in half along long edges, press.
5. Topstitch along each long edge.
7. Fold under one raw edge of Fabric B ½” twice to enclose raw edge.
8. Topstitch close to edge.
9. Repeat steps 7 and 8 for Fabric C.
10. Layer as follows, aligning raw edges, with (a) on the bottom:
- a. regular batting
- b. InsulBright with silver side up
- c. quilted A right side up with loop at top left
- d. B right side down with finished edge near top of A
- e. C right side down with finished edge near bottom of A
11. Stitch a ¼” seam around all edges.
12. Trim corners.
13. Putting your hand inside the Fabric C “pocket”, turn entire potholder right side out.
14. Putting your hand inside the Fabric B pocket, turn again.
15. Topstitch 1/8” from edge through all layers.


Peppermint Pinwheels
Posted at 16:40h, 22 JanuaryPerfect timing! My son's school is having a crafty fundraiser and I was thinking of making some potholders with fabric scraps to sell. I'll definitely try this technique! Thanks!